














How to Create a Project in Jira: Full Setup Guide

Ryan Tanner
Product Marketing Specialist
Sep 8, 2026
Ryan Tanner
Sep 8, 2026

17 min read


This guide will help new users understand how to follow the Jira create project process using simple steps and clear explanations. The goal is to reduce confusion for first time users and avoid mistakes that lead to messy setups. The entire walkthrough will explain what options matter and how to select the right settings that suit your project goals. While Jira is strong for structured project setups, some teams may want a more collaborative environment with connected tools, and this is where modern platforms like Lark start becoming more relevant over time.

What is Jira?
Jira is a structured workspace that holds issues, tasks, workflows, permissions, and tracking elements related to a specific goal or team. Every organization can create a project that fits their operational style, work culture, and delivery process. Understanding how to create new projects in Jira helps prevent setup mistakes and ensures that your system grows logically over time with fewer adjustments. Teams who learn how to create projects in Jira early also build better clarity in ownership and reporting.
When users want to create a project in Jira, they must remember that Jira organizes everything based on issues rather than simple tasks. Issues include bugs, stories, epics, and many other customizable types. Permissions, roles, views, boards, and reporting dashboards all rely on proper project configuration. Teams that know how to create a new project in Jira with correct fundamentals usually achieve better scalability and easier reporting outcomes. Learning how to create projects in Jira becomes even more important when multiple departments collaborate.
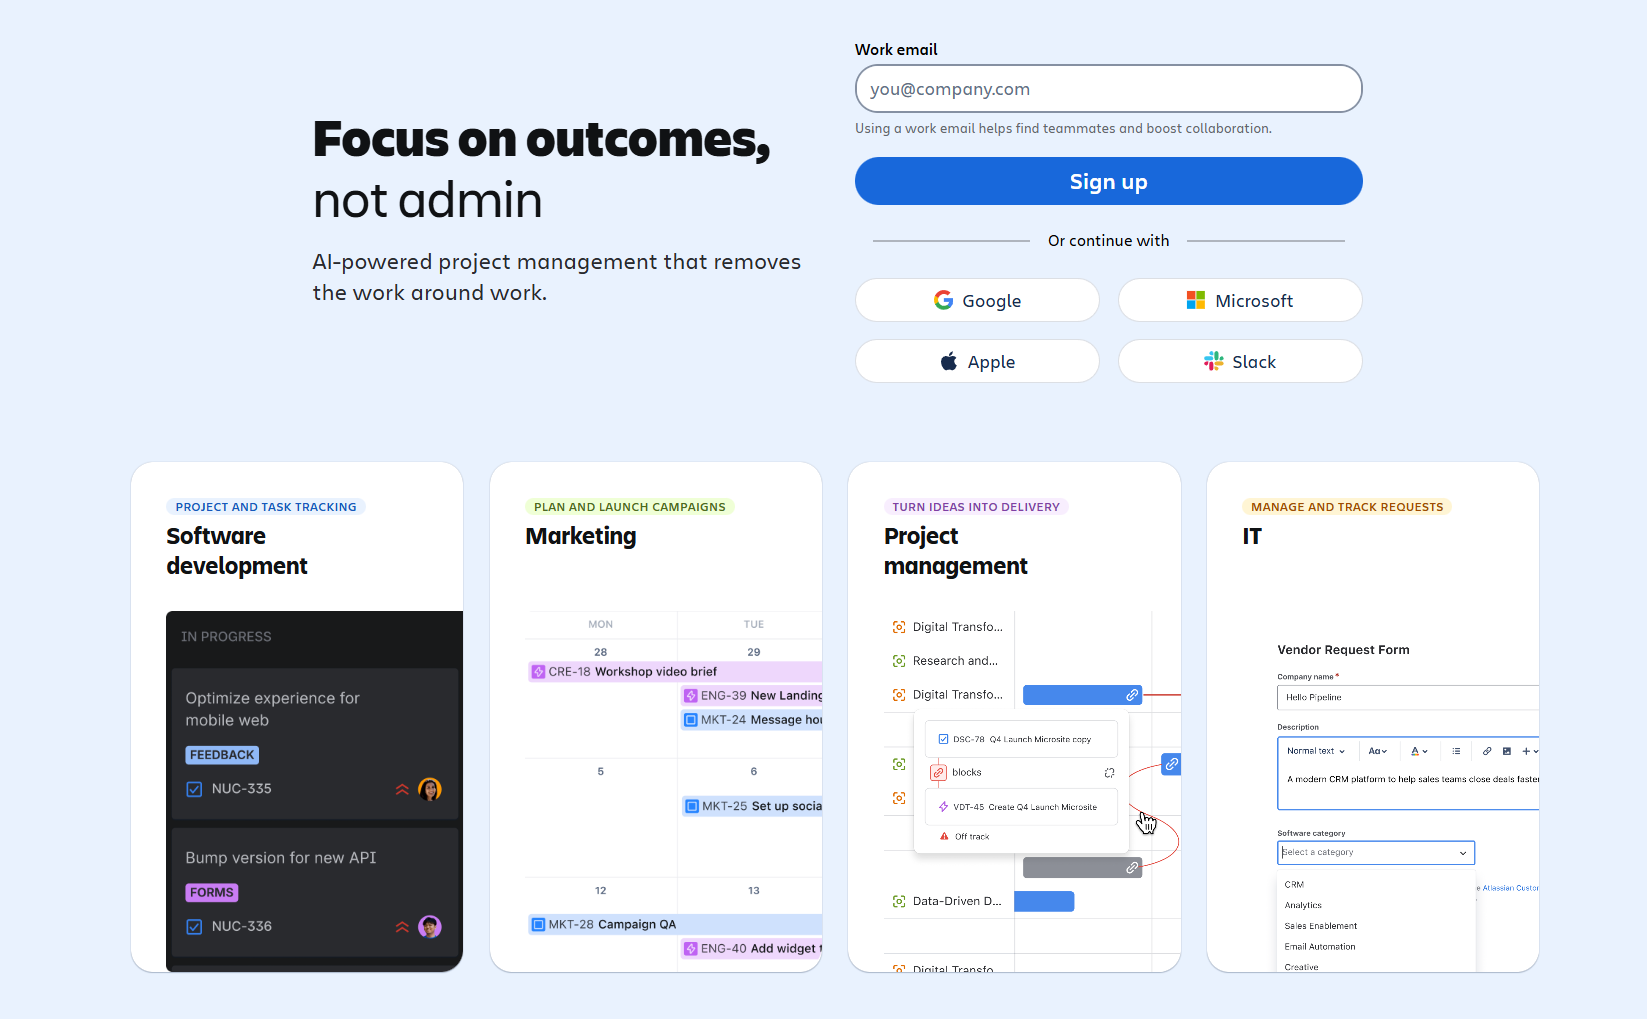
Image source: atlassian.com
Jira project types explained
This section will help users understand the different project types before they create new project in Jira. Many beginners select the wrong option and later need to restart the setup, which wastes time and effort. Knowing how to create a new project in Jira with the correct type ensures smoother workflows, cleaner reporting, and fewer configuration resets. When you learn how to create project in Jira while understanding project categories, your setup will match your work style perfectly.
- Software project: This option is suitable for development teams that manage features, sprints, and defect handling. When you create a project in Jira in this category, tools like Scrum and Kanban become available immediately. It is helpful for engineering and product teams who run sprint cycles. It is also ideal if your organization needs backlog grooming and release planning with issue tracking.
- Service project: This type focuses on service delivery, ticket intake, cases, and customer support. When you learn how to create a project in Jira with IT service workflows, you receive access to request forms, SLAs, queues, and service management reports. It is useful for technical support teams, customer success teams, and IT help desks. The system is designed to handle continuous incoming requests rather than sprint cycles.
- Business project: This category works well for internal business processes, HR requests, marketing plans, financial operations, and approval flows. It simplifies task management without software centric components. When you create a new project in Jira for non-technical teams, this is usually the correct category to begin with. It gives simple boards, statuses, and reporting tools that match operational work.
- Product discovery project: This project type focuses on idea management, research, priority scoring, and product definition at early stages. It is used by innovation teams, founders, product managers, and strategy groups. When users learn how to create a new project in Jira with this model, they gain tools for prioritization frameworks, feedback grouping, and roadmap thinking.
How to create a project in Jira
This section explains how to create a project in Jira using simple guided instructions. These steps work for all editions, including cloud editions. When following these steps, users should avoid making any rushed configuration choices. Understanding how to create a project in Jira with clarity reduces the need for long-term cleanup activities. Below is the complete step sequence for creating a new project in Jira from start.
Step 1: Access, sign up, and log in
Begin by navigating to the Jira website. New users can click Get Jira for Free to sign up, providing a work email or using a supported platform, verifying the email, entering their full name, creating a secure password, and adding their business or project name. Existing users can log in with their credentials to access the dashboard.
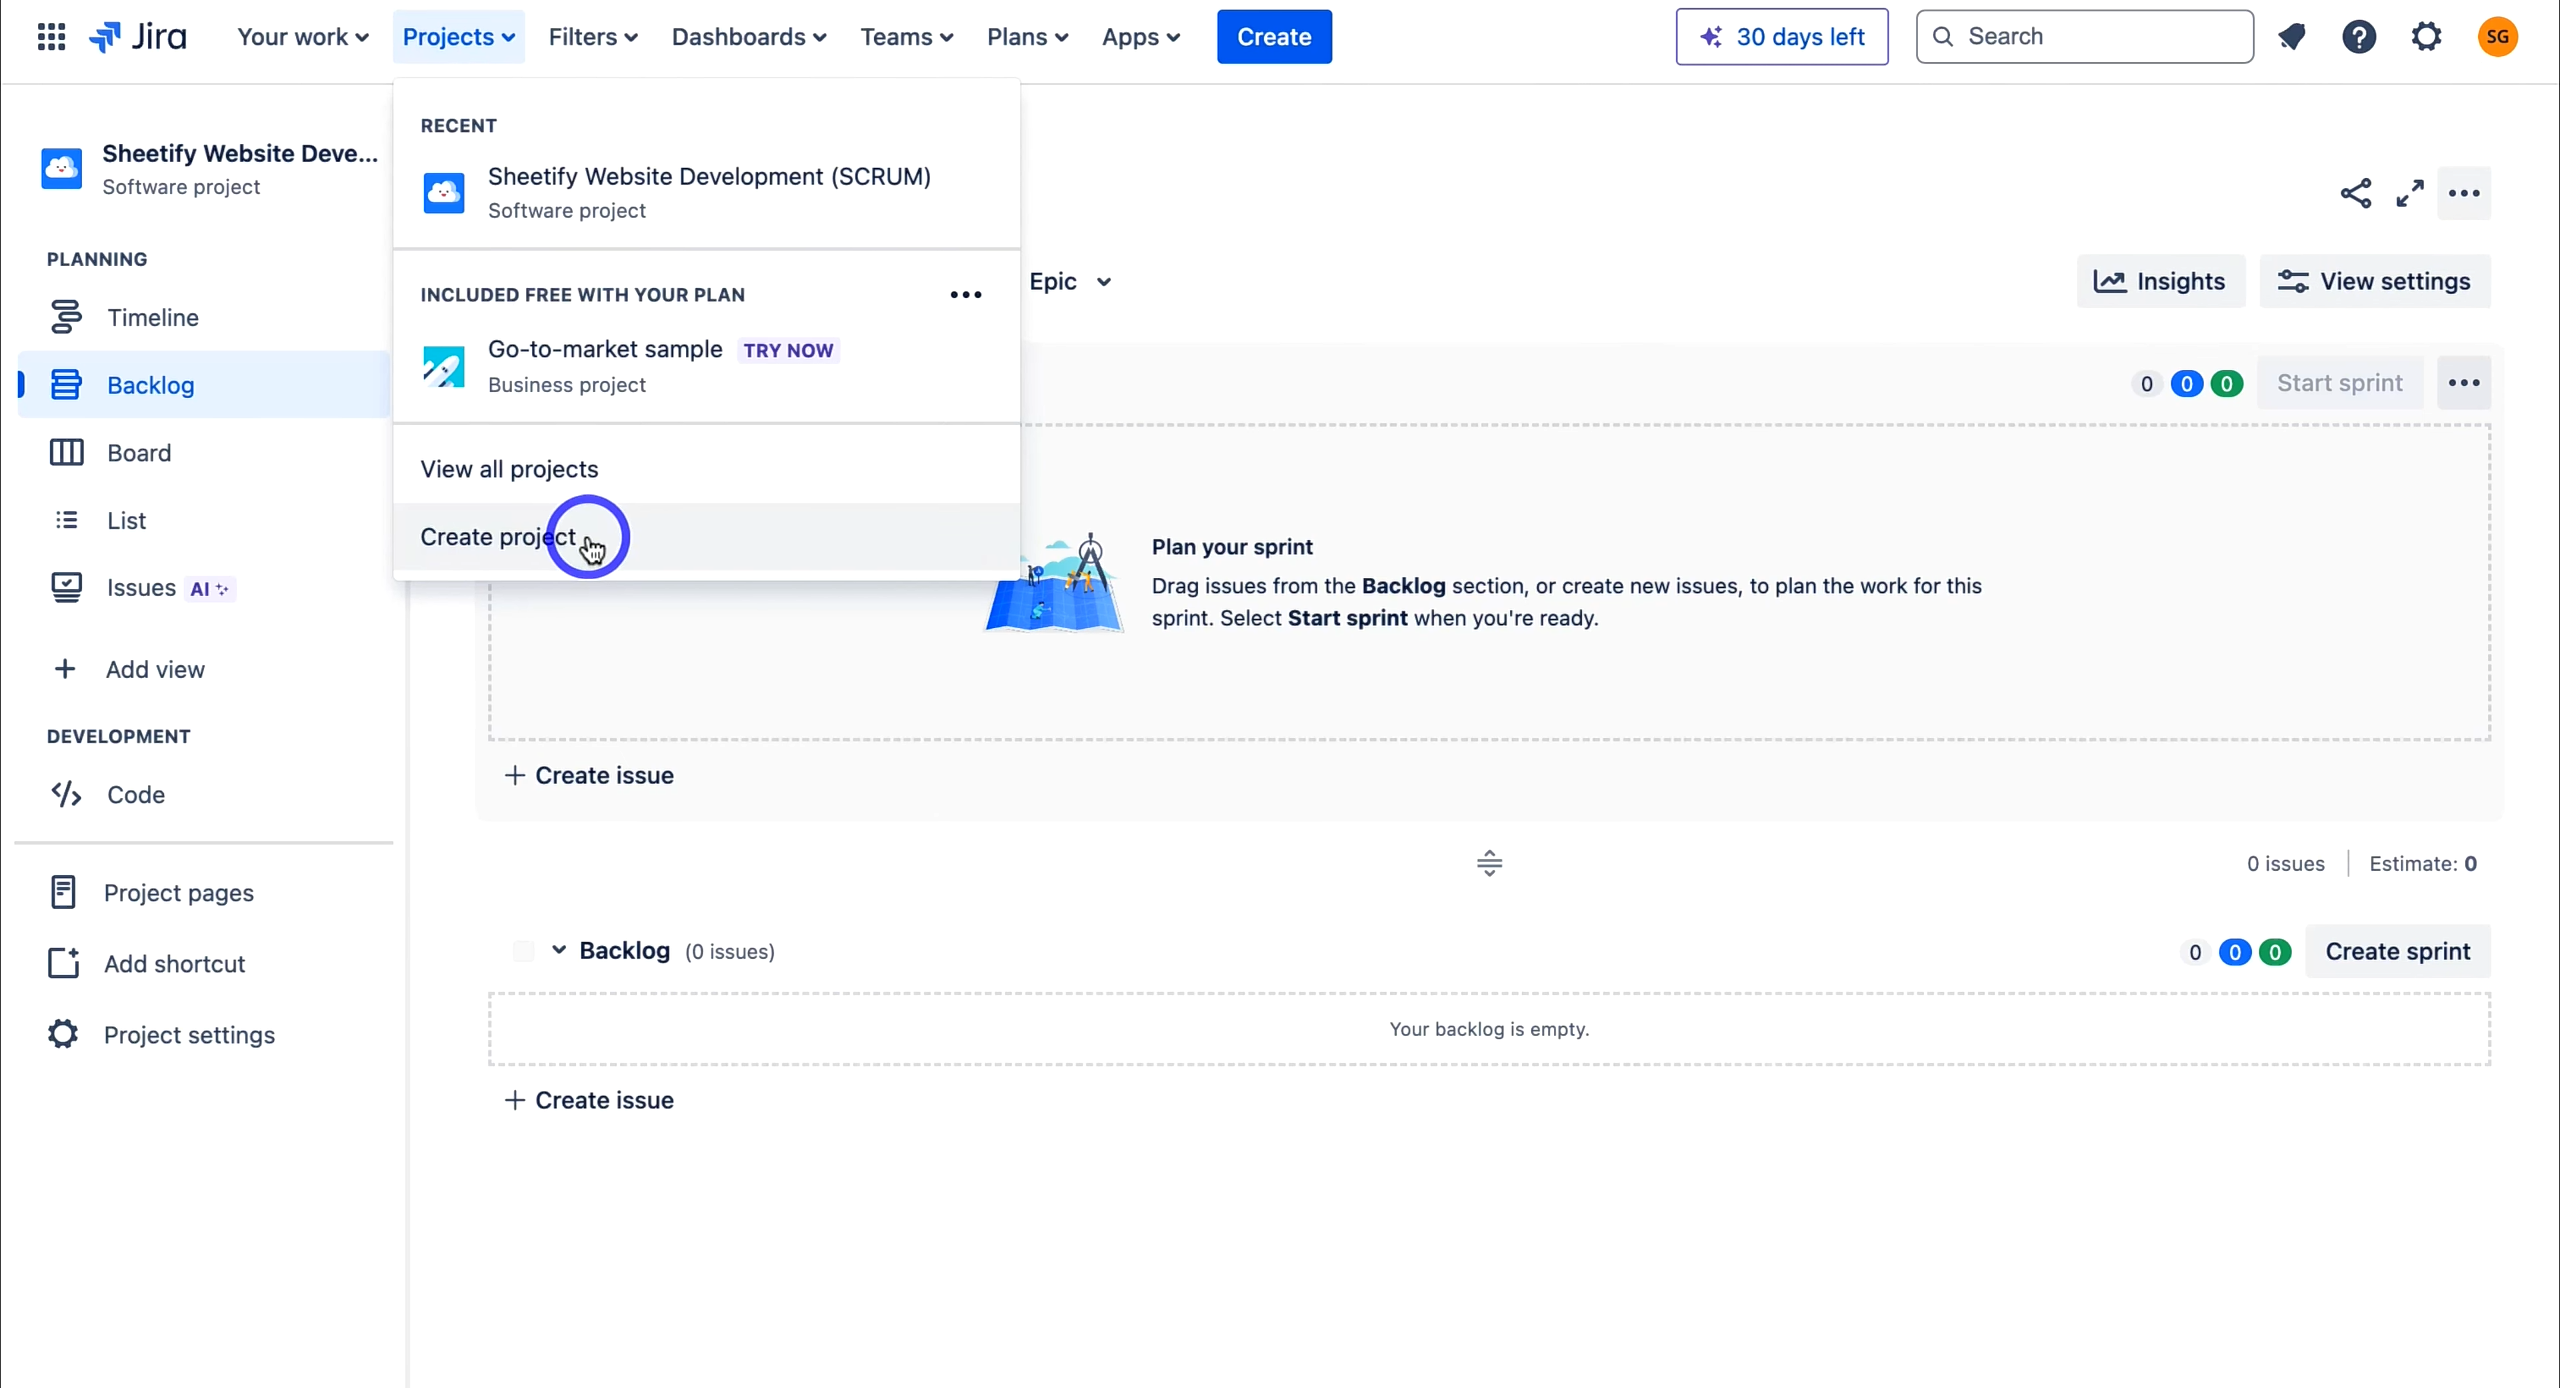
Image source: atlassian.com
Step 2: Select project type and name your project
Choose the type of project you want to manage. For Agile project management, select software development → scrum to enable sprint-based workflows. After selection, name your project (e.g., Sheify Website Development) and click Get Started to enter your project workspace and dashboards.
Step 3: Invite team members
Add your team to collaborate on the project via email or supported platforms. Assign permissions carefully to control who can view, edit, and manage tasks, then send the invitations.
Step 4: Understand project structure
Familiarize yourself with Jira's hierarchy. The backlog is a dynamic list of upcoming work items. Epics represent large bodies of work, stories break epics into smaller units, and tasks are actionable items within stories. Understanding this structure is essential before creating work items.
Step 5: Create epics, stories, and tasks, and add to sprints
Create epics by adding summaries, descriptions, dates, labels, and assigning owners. Add stories under epics with relevant details, labels, dates, and assignments. Then create tasks, linking them to stories and epics, adding all necessary details. Move these items into sprints by defining start and end dates, duration, and sprint goals to provide a clear plan of action.
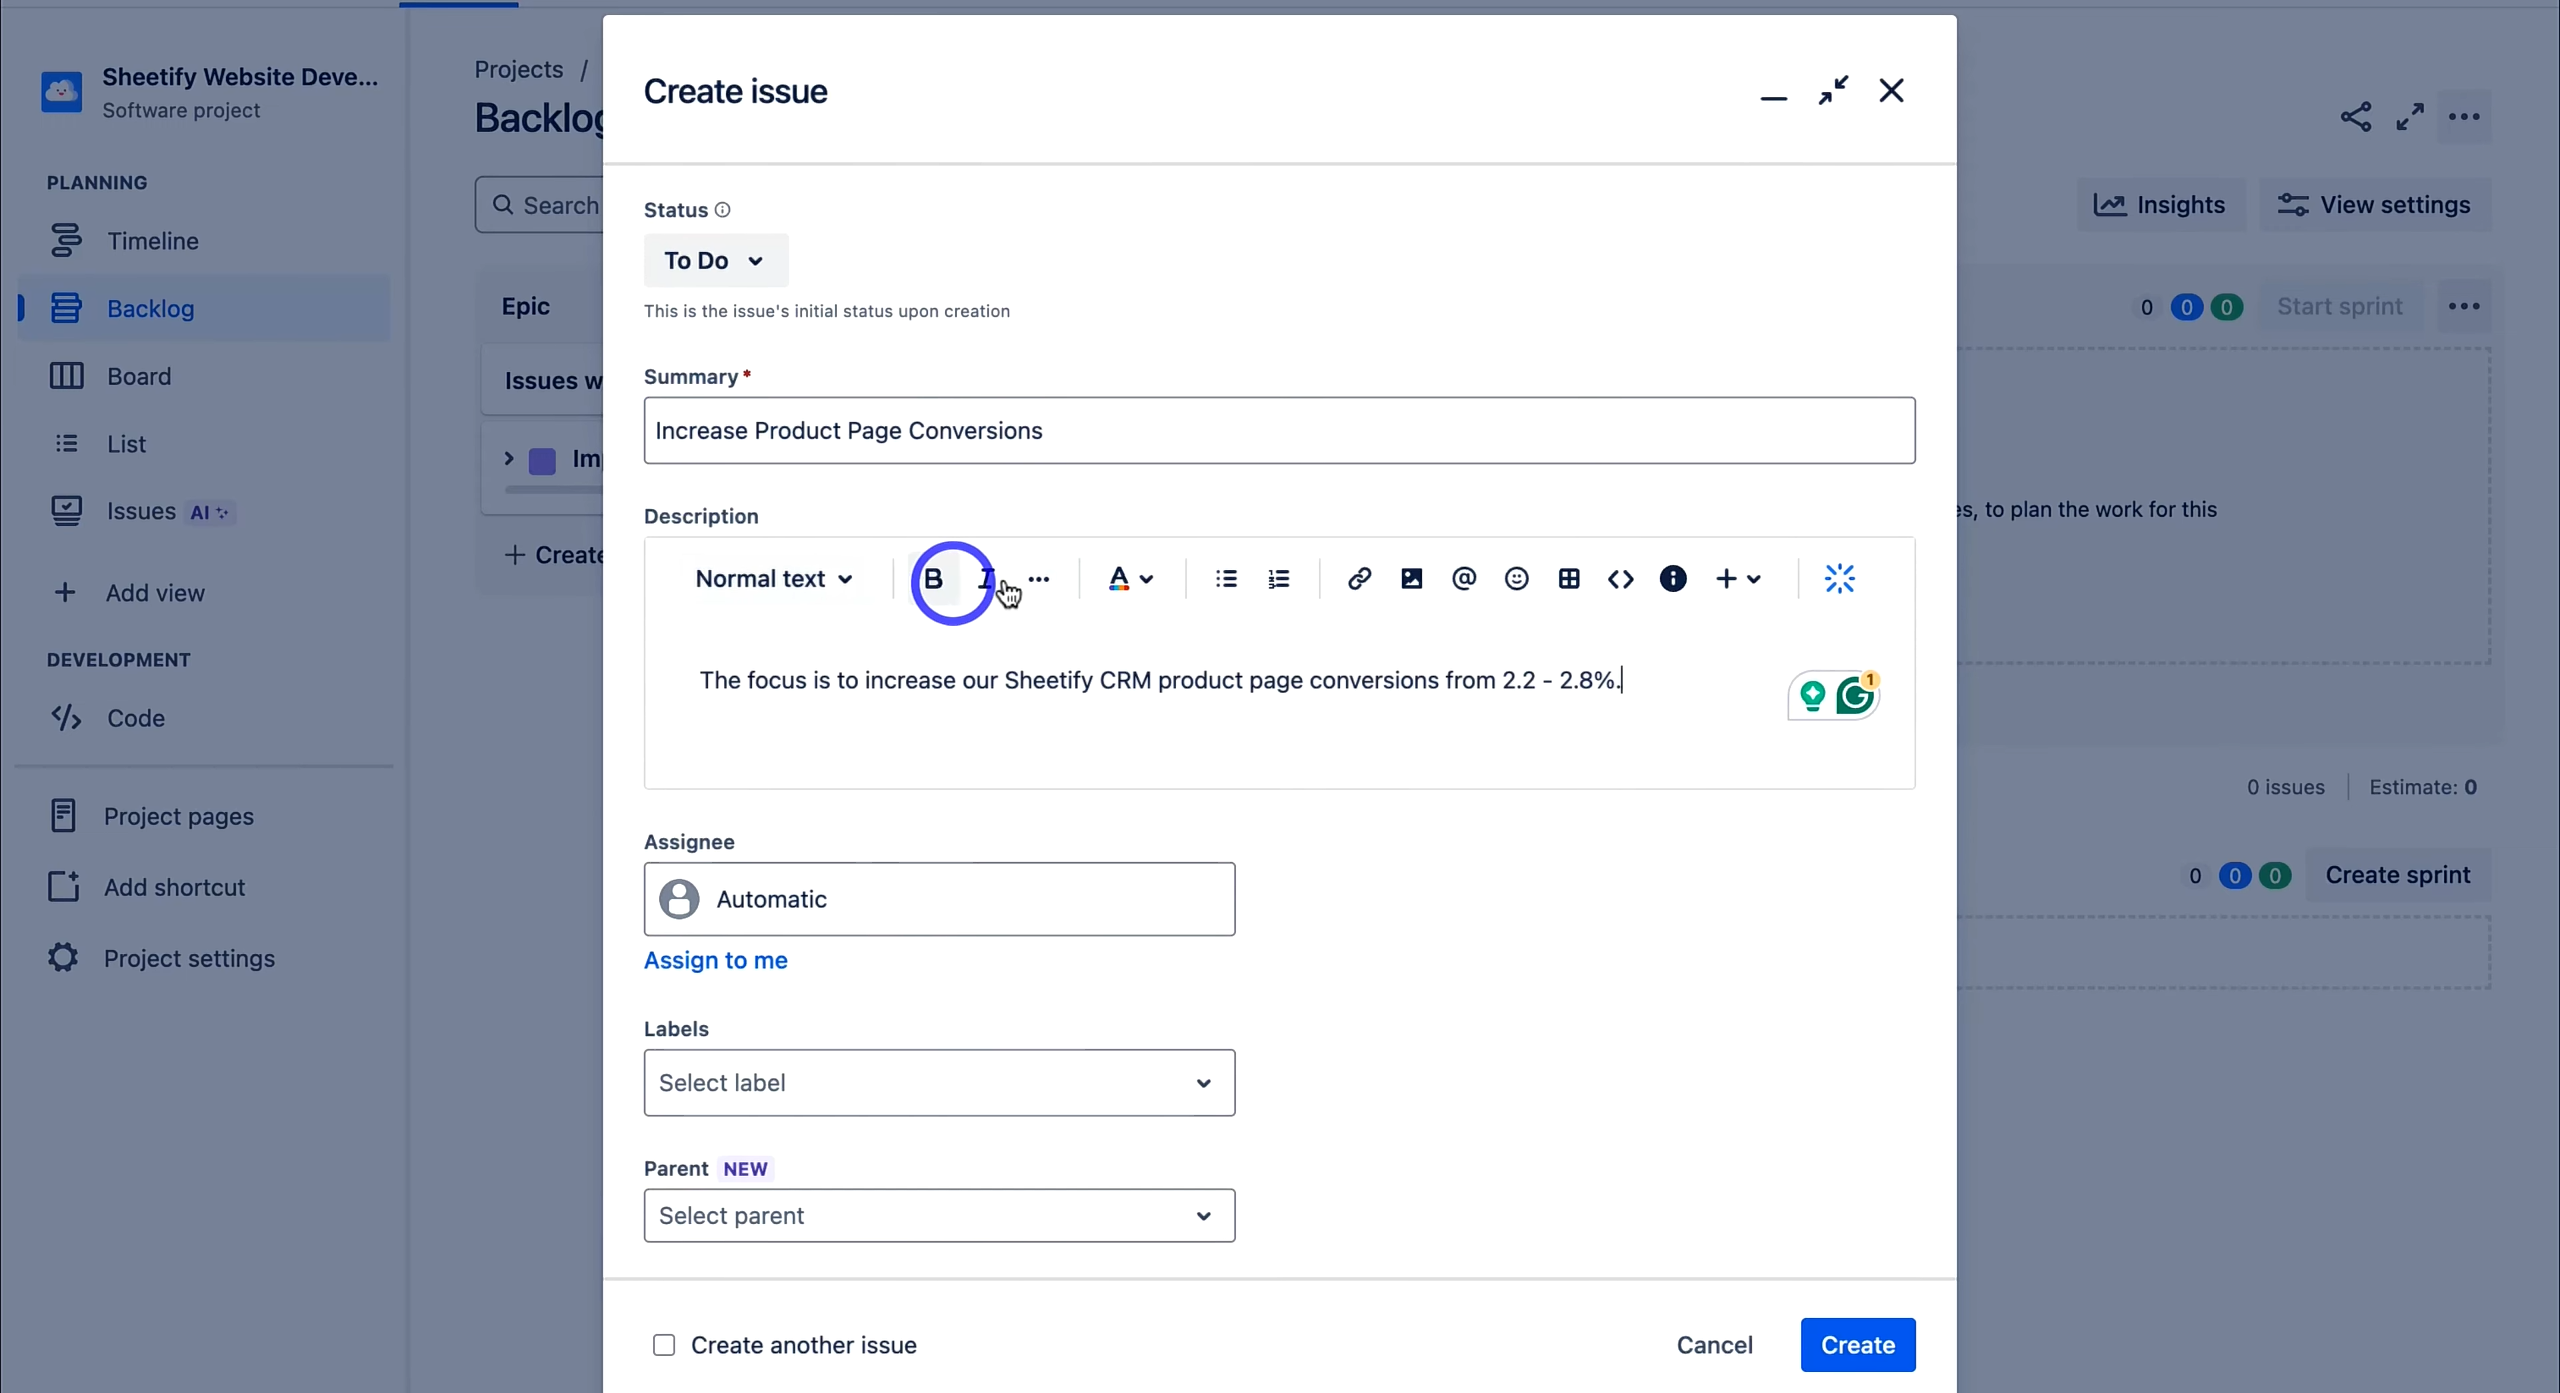
Image source: atlassian.com
Step 6: Track progress, leverage features, and create new projects
Monitor progress using boards, timelines, lists, and issue views, moving tasks through workflow stages. Use additional features such as dashboards, project pages, retrospectives, and integrations like Slack or time-tracking tools to improve collaboration and efficiency. When needed, create new projects via Projects → Create New Project, selecting templates and team or company-managed settings, and configure boards and workflows tailored to your team.
Initial configuration after creating a Jira project
After users complete how to create project in Jira, they must adjust essential elements before actual work begins. Correct post setup configuration ensures clean reporting, better workflows, and smooth collaboration. People who learn how to create a new project in Jira must not skip these fine tuning steps because they directly affect long term adoption. Below are the important items to configure.
- Boards overview: Scrum and Kanban boards control visual progress tracking. Scrum suits sprint based delivery cycles while Kanban suits continuous work. Choosing correctly improves clarity and speed.
- Issue types: Issue types include stories, bugs, tasks, and epics. Proper mapping ensures accurate reporting and categorization. Each issue type reflects a different work function.
- Workflows: Workflows move tasks through coded status stages. Teams must avoid adding too many steps because complexity slows work. Clear stages improve transparency.
- Permissions: Configure who can view, edit, transition, or close items. Proper permission mapping prevents accidental updates or unauthorized access. Role clarity improves accountability.
- Notifications: Set up email triggers, periodic updates, and escalation alerts. Notifications help teams avoid missed deadlines. Ensure frequency is not overwhelming.
- Components and labels: Components allow clustering of items into sub categories. Labels give flexible tagging. Both improve filtering and reporting when project scale expands.
- Backlog setup: Review backlog structure and sorting order. Use priority, category, or timeline grouping. Clean backlog planning helps sprint readiness.
- Sprint setup: If Scrum is selected, define sprint length, capacity, and iteration name rules. Consistency improves historical reporting.
Common mistakes beginners make when creating Jira projects
Understanding how to create a project in Jira also requires awareness of common beginner errors. These mistakes often lead to confusion, duplicated setup efforts, and a rapid decline in adoption. When teams learn how to create a project in Jira slowly and with planning, results stay more stable. Below are typical errors that should be avoided.
- Selecting the wrong template: Choosing inappropriate templates leads to unnecessary complexity or missing features. This forces rework or another fully created Jira project setup.
- Choosing the wrong project type: Selecting incorrect team-managed or company-managed settings can create governance issues. This affects configuration privileges and approval flows.
- Workflow over complexity: Beginners try to add too many transitions, conditions, and stages. Complex workflows slow execution and reduce adoption across teams.
- Assigning too many roles: Users sometimes assign unnecessary roles and access. This causes confusion and reduces accountability standards across the board.
- Poor board planning: Boards must align with process planning. Unstructured boards cause tracking confusion and reporting gaps.
Afterthought
While Jira offers powerful project management features, beginners often encounter limitations that can slow adoption and complicate workflows. Issues such as overly complex workflows, misaligned boards, rigid permission settings, and template or project type errors can create confusion and reduce efficiency. Teams seeking a more intuitive, all-in-one solution that combines project tracking, communication, and automation may find Lark a compelling alternative, as it streamlines setup and keeps processes connected across tasks, calendars, docs, and approvals.
New alternative: Try Lark for centralized and smart project management
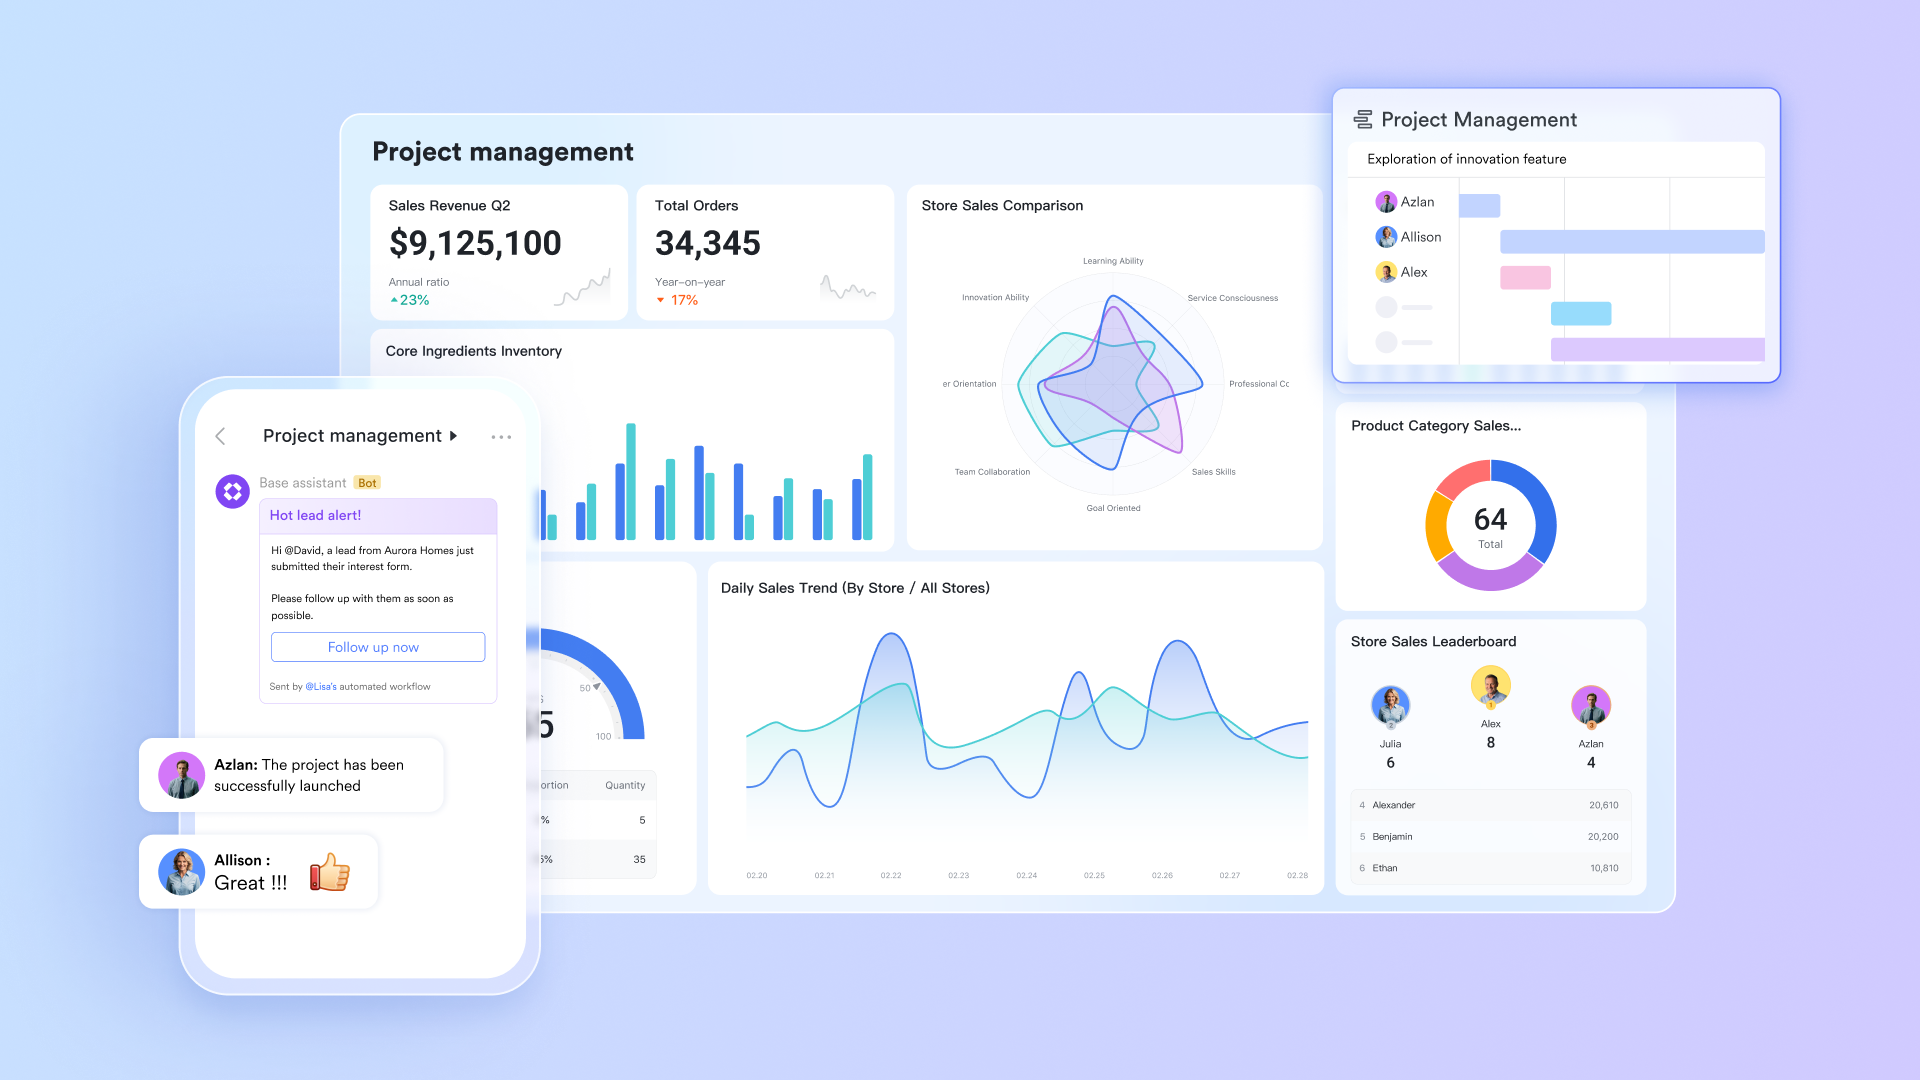
This section explains how Lark provides project structure benefits different from traditional systems. It focuses on flexible working models, cross-team collaboration, and data visibility. Teams that learn how to create new projects in Jira can still use Lark as a powerful connected workspace for planning, document collaboration, analytics, communication, and decision-making. Lark provides modular work areas where communication, tracking, and files remain unified within a single platform.
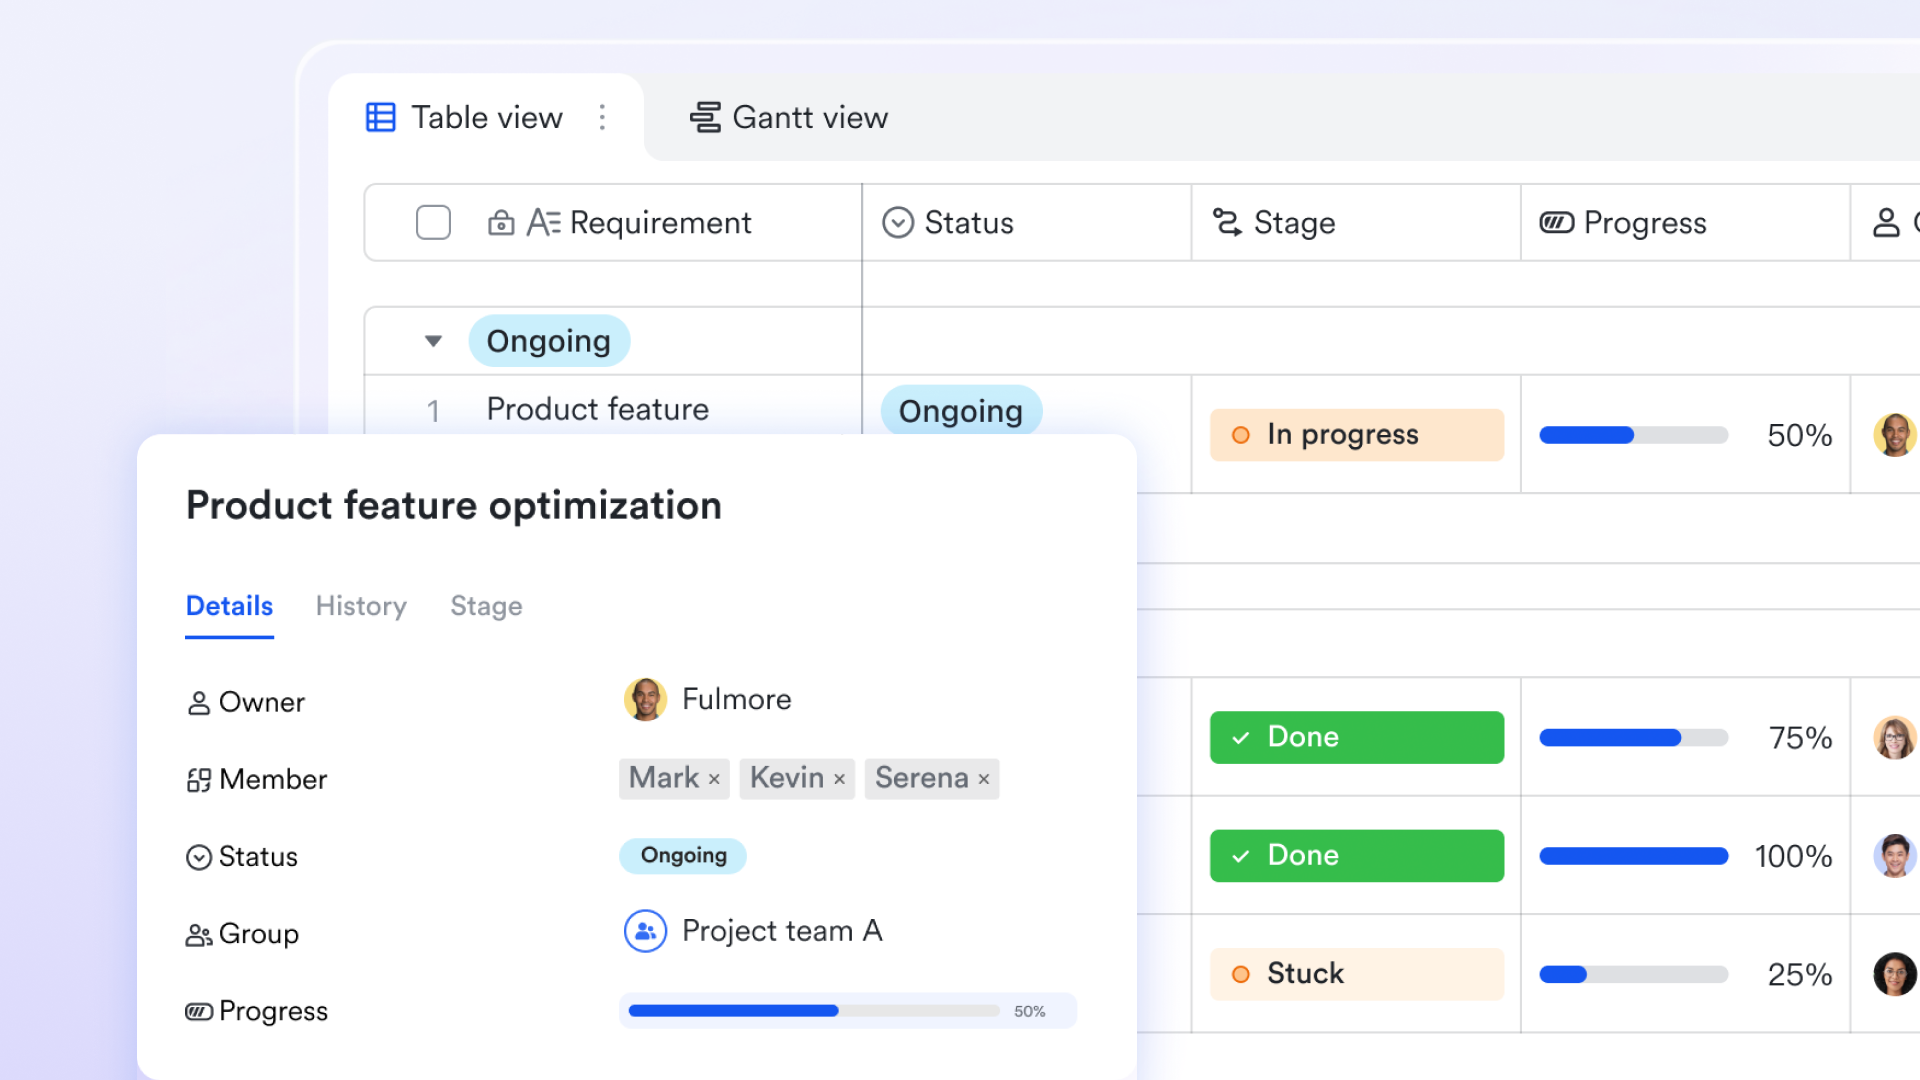
Multiple tables for complete project organization
Lark Base allows teams to create multiple tables within the same project space, making it possible to separate workstreams without losing context. One table can track tasks, another can manage team members, and another can store deliverables, resources, or milestones. Because each table has its own fields, views, and structure, complex projects remain organized instead of overwhelming. This modular design supports everything from sprint planning to cross-team collaboration in a single unified project environment.
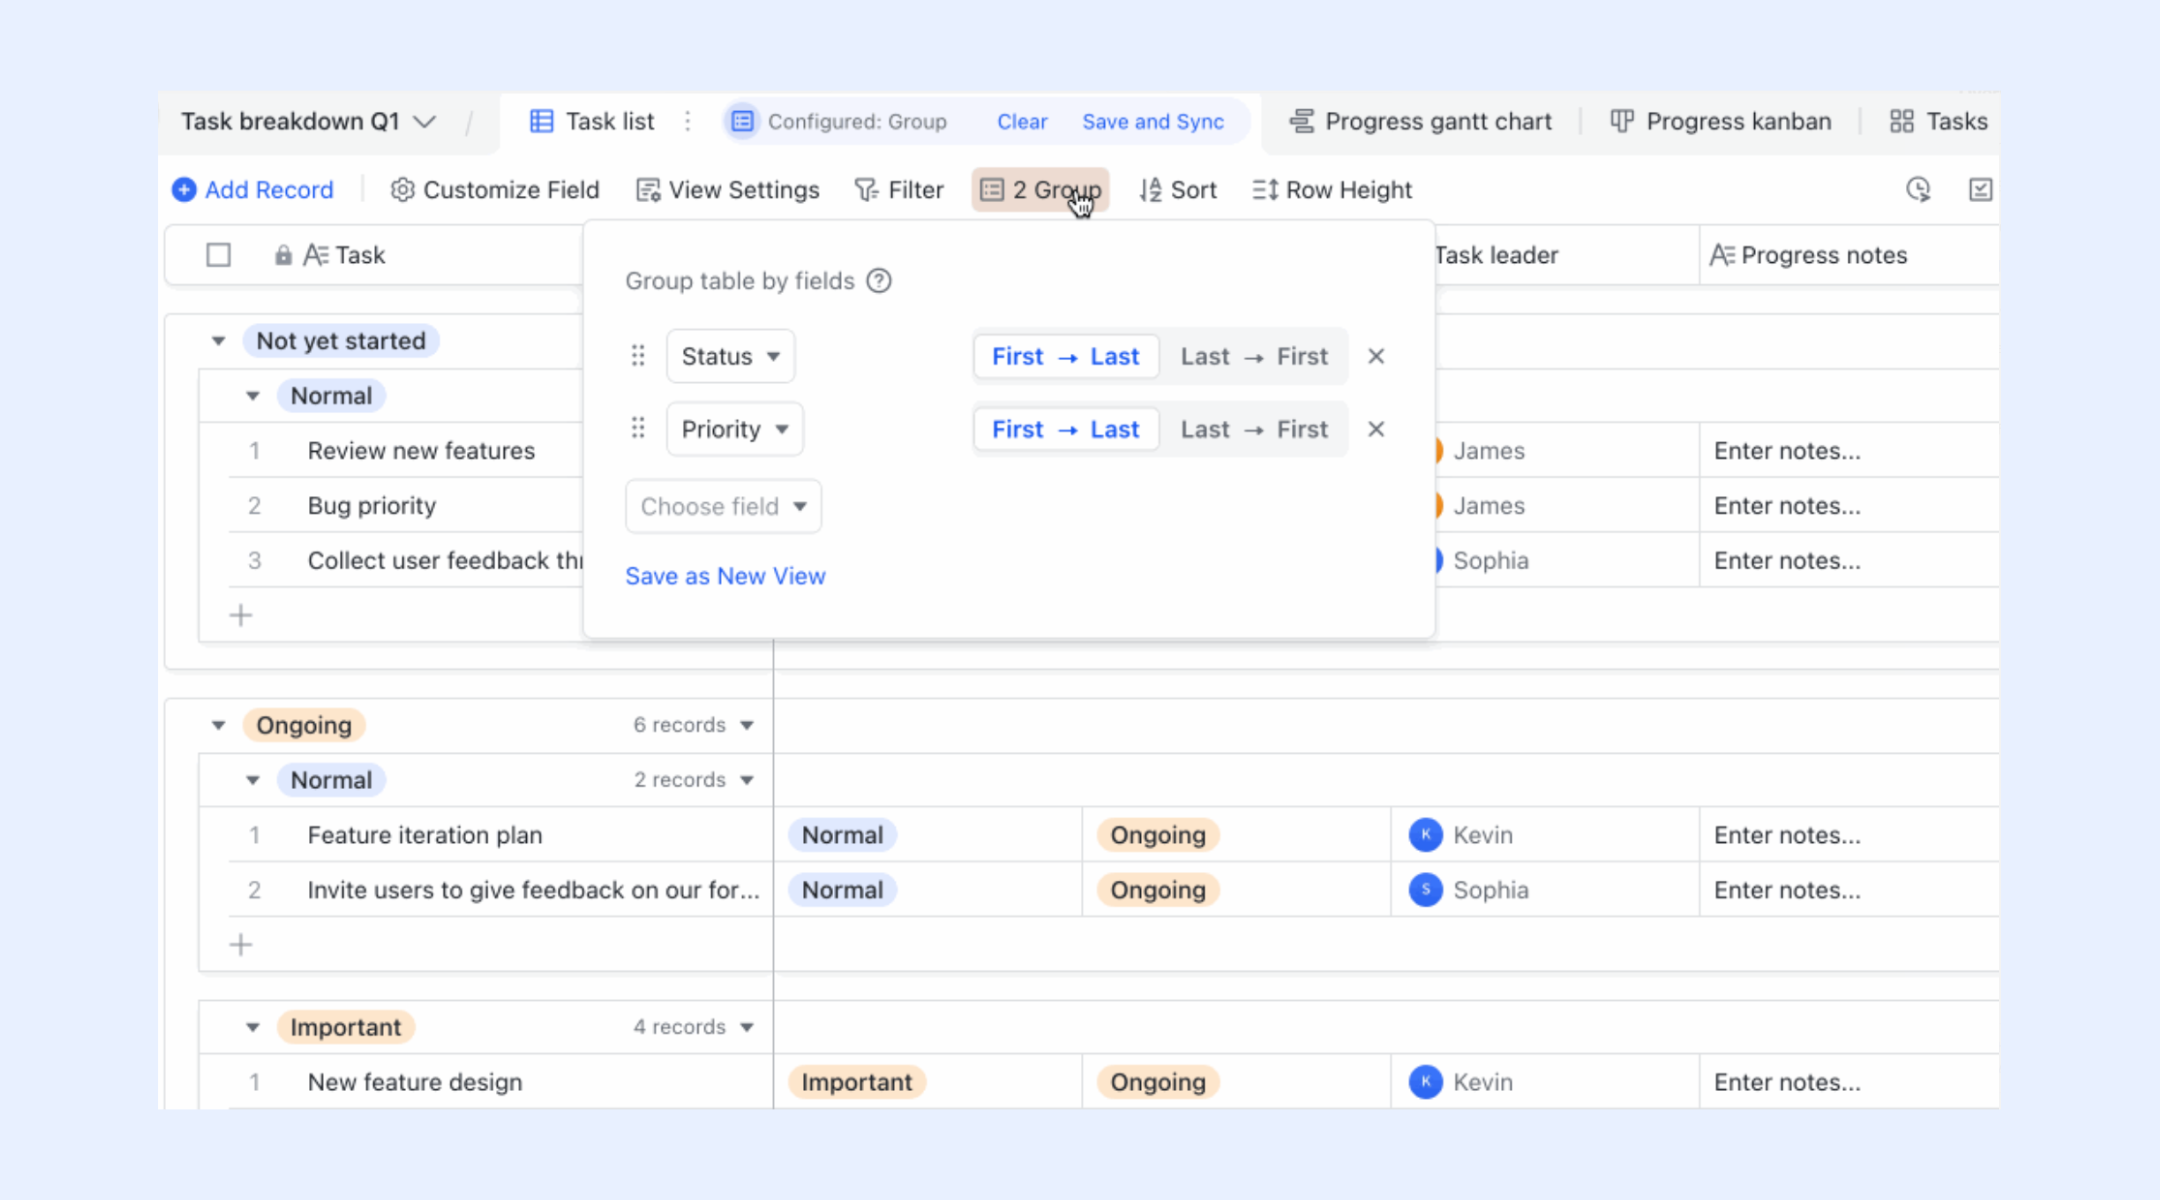
Groups and filters for structured project data
Groups and filters in Lark Base help teams organize large volumes of project data so information stays easy to navigate. Groups let you categorize records by status, assignee, priority, sprint, or any custom field you define, giving you an instant visual breakdown of work. Filters narrow the view to only what you need, such as overdue tasks, items assigned to a specific member, or tasks within the current sprint. This reduces noise, speeds up reviews, and ensures that project managers and team members always see the most relevant tasks without scrolling through cluttered lists.
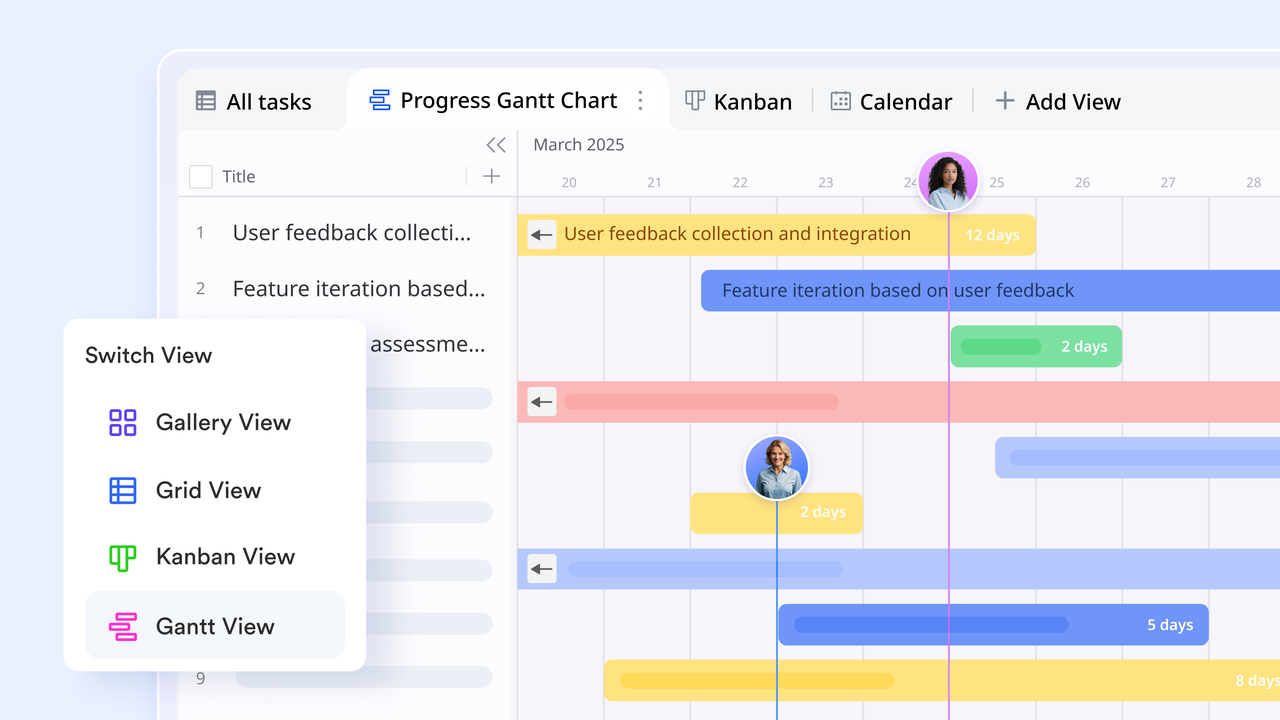
Multiple views for visual project tracking
Multiple views in Lark Base enhance project management by allowing you to visualize and handle data from different perspectives. The grid view organizes information in rows and columns, making it easy to track and standardize data. The Kanban view groups tasks by category or status, enabling real-time progress monitoring and quick updates through drag-and-drop functionality. The Gantt view provides a clear overview of project timelines, allowing you to adjust task durations and help keep schedules on track. The form view streamlines data collection, reducing entry errors and ensuring more accurate and consistent information.
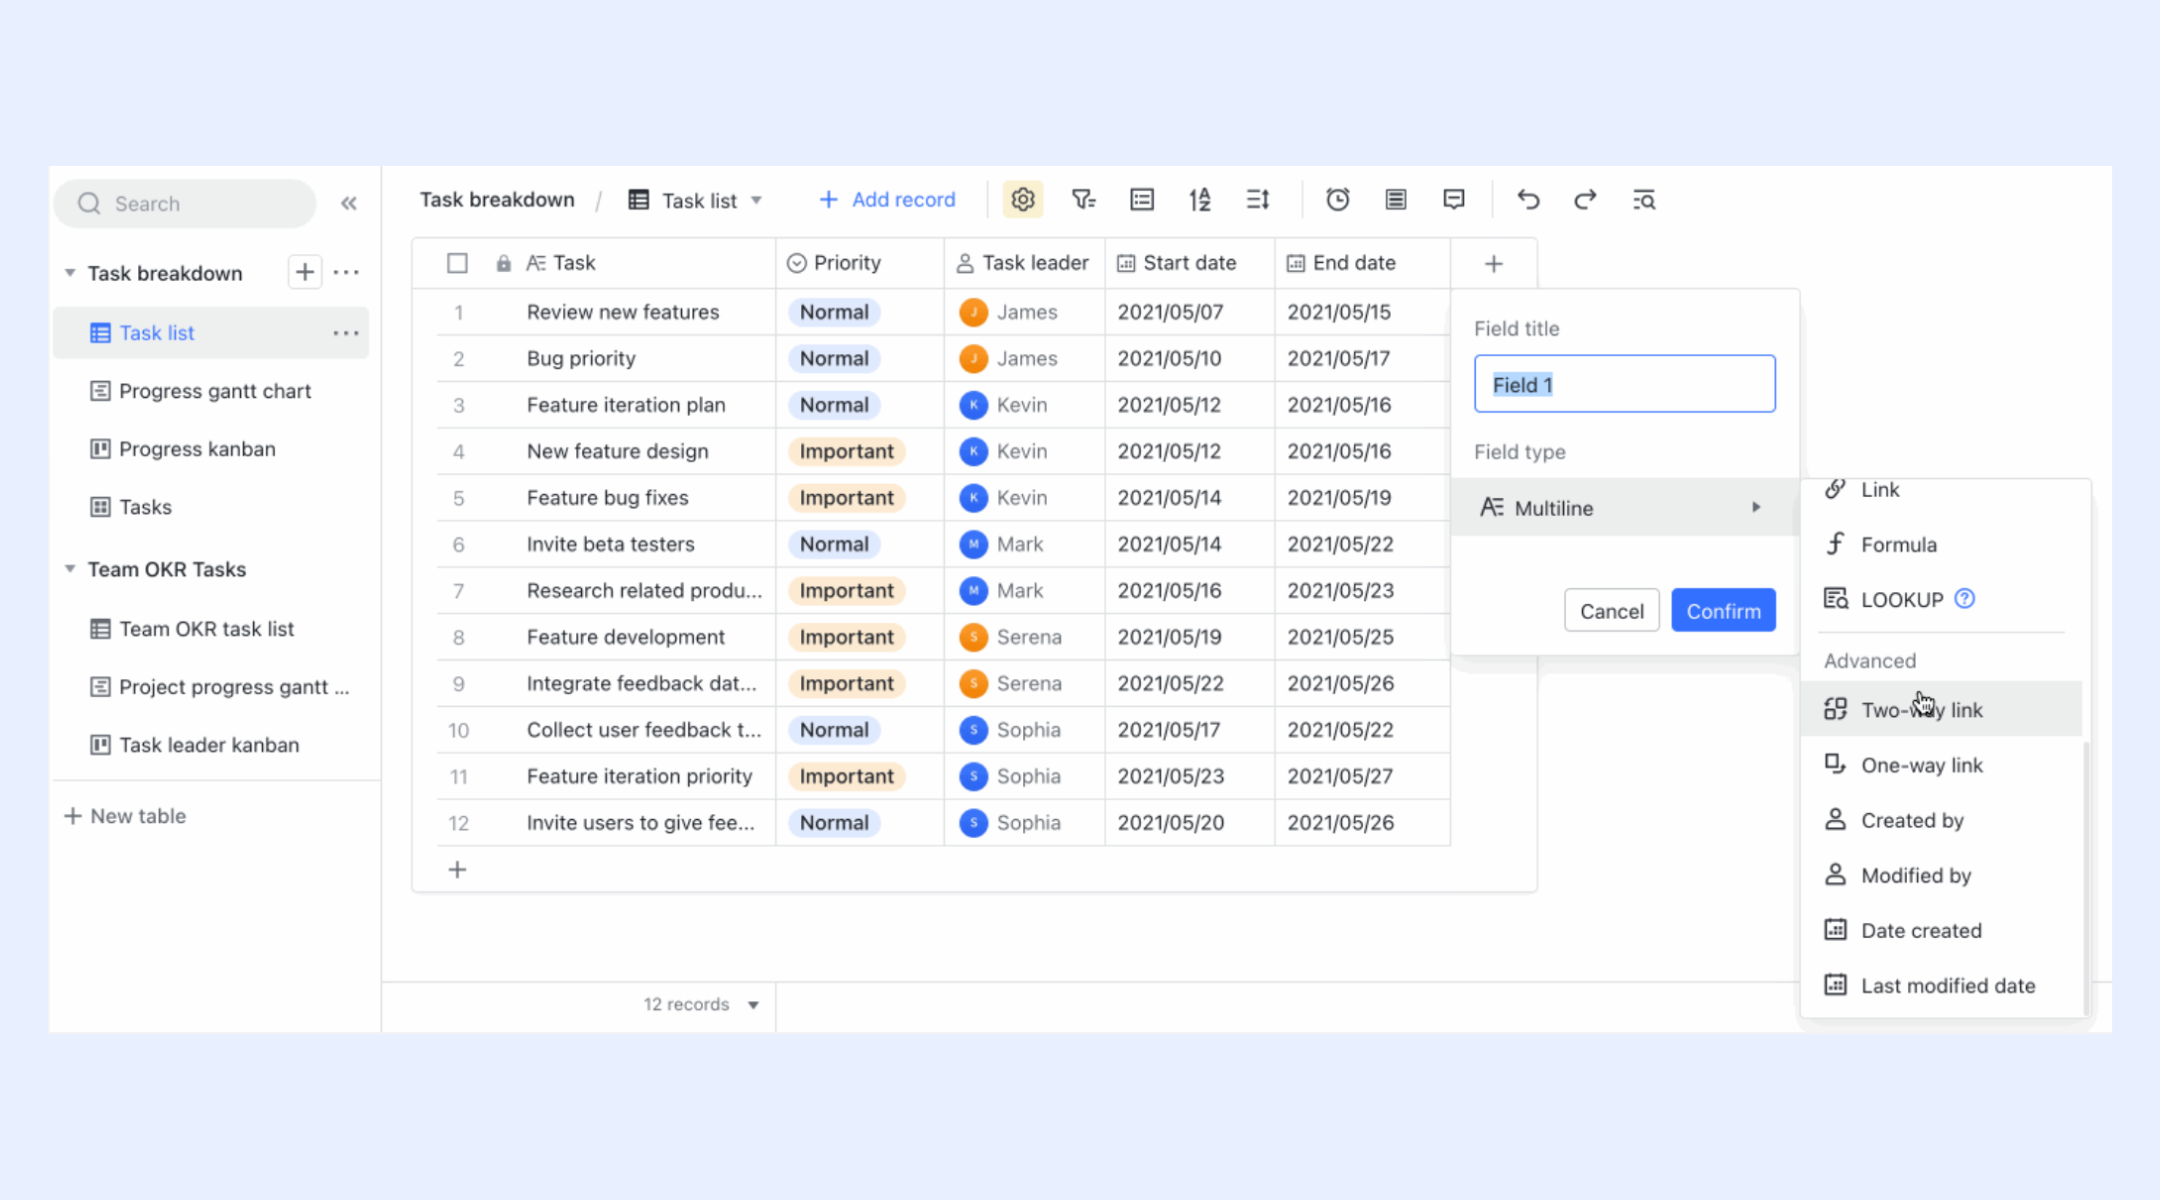
Two-way link for synchronized project data
Two-way links connect records across different tables so updates remain consistent everywhere. When a record changes, such as a project stage, owner, or deadline, that update automatically reflects in all linked tables. This prevents mismatched information, eliminates duplicate entries, and ensures that every team member works from the same accurate data source. It's especially valuable for projects that involve resource tracking, cross-department collaboration, or multi-table workflows.
Automations for automatic execution & removal of repetitive tasks
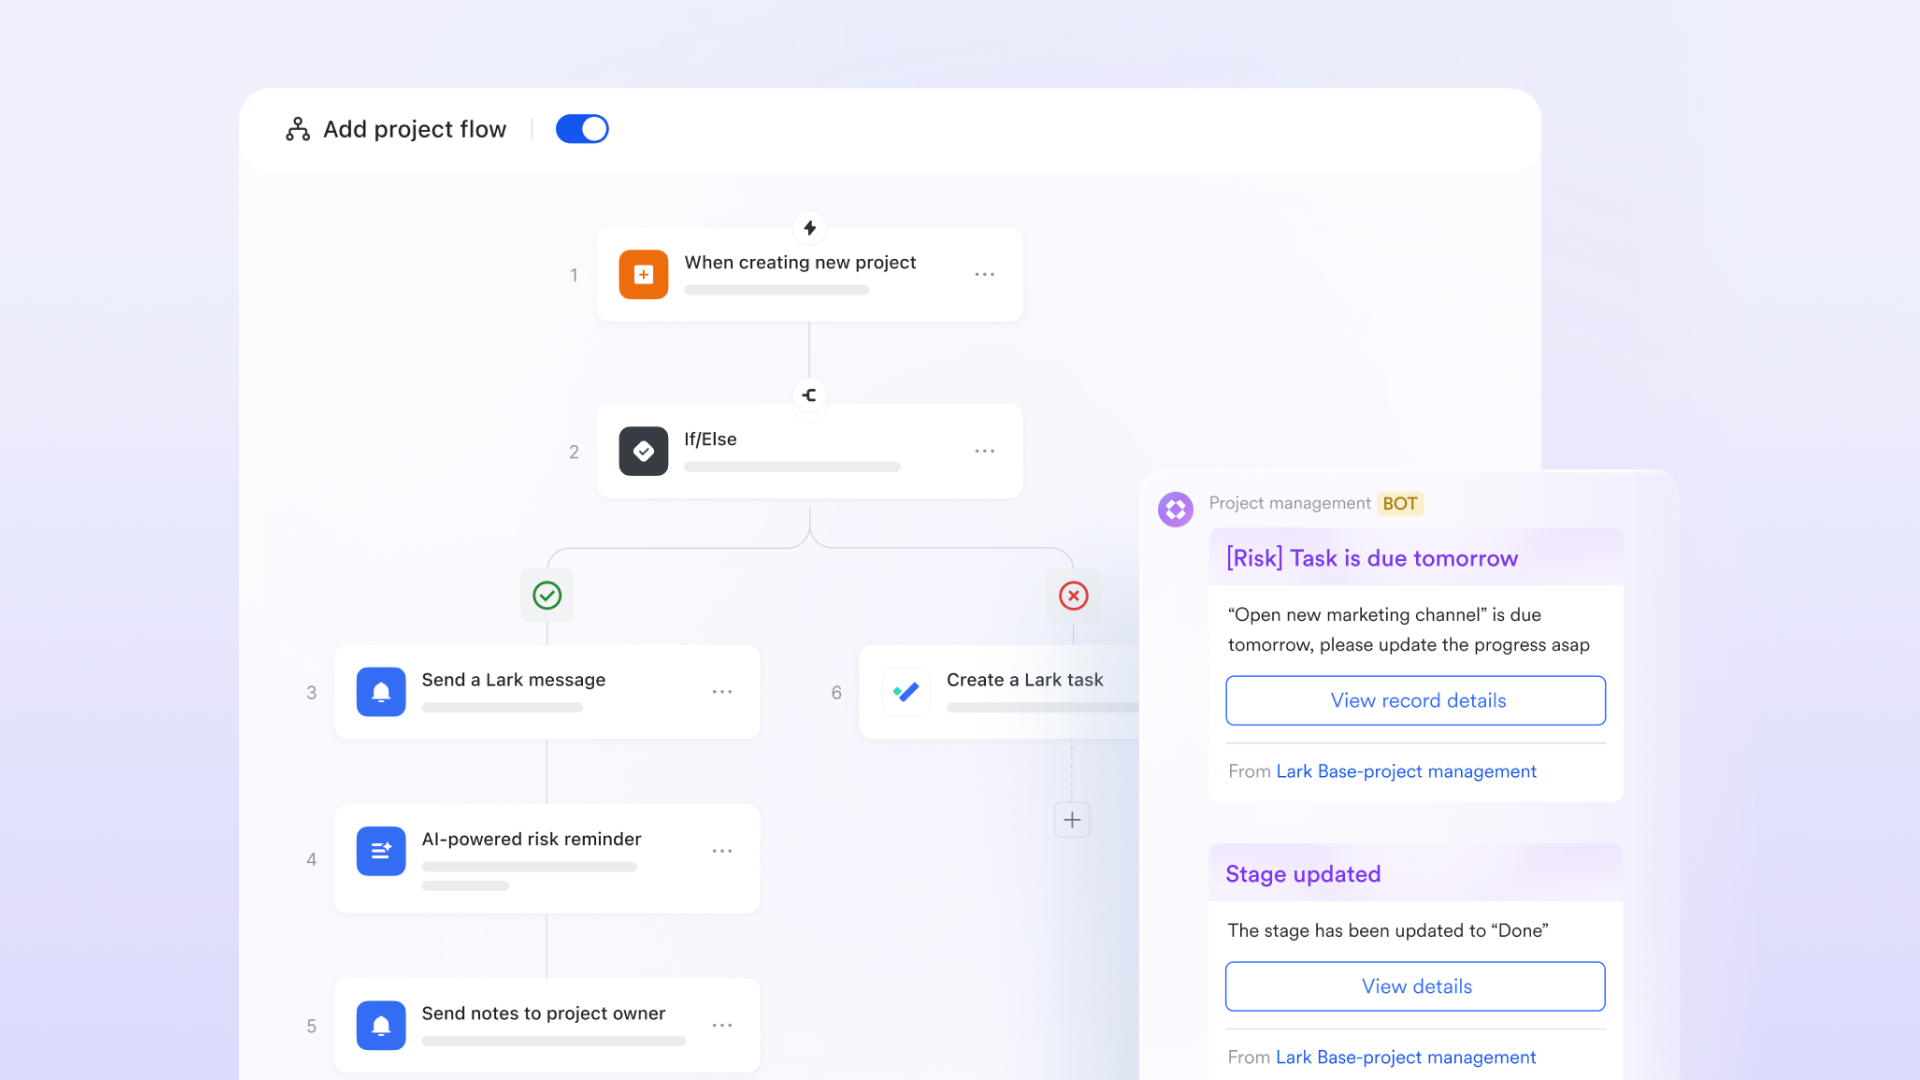
Lark Base automations streamlines project management by automatically creating events, tasks, and groups based on project data, improving team coordination. It breaks down projects into discrete tasks and syncs them with Lark Calendar for better scheduling and clear ownership. Automated reminders and updates keep team members informed of progress, while feedback or exceptions are summarized and sent to the responsible individuals for timely follow-up.
Templates for faster project setup
Lark includes ready-made templates designed for project planning, reporting, task management, sprint tracking, content production, and more. These templates provide teams with a head start by offering pre-built structures, including fields, views, and workflows. Instead of building every project from zero, teams can customize a template and launch their work in minutes.
- Starter plan: Free forever plan that includes 11 powerful tools for up to 20 users. It also comes with 100GB of storage, 1000 automation runs, AI translations, and more.
- Pro plan: $12/user/month (billed annually) for up to 500 users. It includes everything in Starter plus group calling for up to 500 attendees, 15TB of storage, 50,000 automation runs, and more.
- Enterprise plan: Contact sales for custom pricing. Supports unlimited users and includes even more automation runs and advanced security, compliance, and management features.
Choose smartly: Lark vs Jira in project management
To understand how Lark and Jira differ in managing projects, it helps to compare them across key dimensions such as purpose, ease of use, project structure, automation, and reporting. While both tools support task management and team collaboration, their focus, capabilities, and workflows vary significantly depending on the type of project and team needs. The table below highlights these differences to help you evaluate which platform best suits your workflow.
How to choose the right project management environment
This section explains how to compare systems once you know how to create new project in Jira. Every team has unique needs based on growth, workload, and communication patterns. Consider these evaluation factors before creating multiple environments. The correct selection supports long term clarity and efficiency.
- Usability: Look for simple navigation and new user learning speed. If tools require heavy instructions, adoption slows down. Teams always prefer intuitive interfaces.
- Customization: Check how deeply you can adjust fields, workflows, and views. Customization should help productivity instead of creating clutter.
- Workflow complexity: Choose tools that match your operational process rather than forcing unnecessary steps. Natural flow increases completion speed.
- Cross-team communication: Information sharing must be easy, searchable, and centralized. Teams work better when conversations connect to data.
- Visibility and reporting: Status, progress, and metrics should be easy to view across roles. Clean transparency helps make faster decisions.
- Automation depth: Automated alerts, reminders, and triggers reduce manual tracking. The system should help teams stay ahead.
- Scalability: Tools must continue performing well even when project sizes increase. Growth readiness ensures future stability.
Conclusion
Learning how to create a project in Jira becomes simpler when users follow a structured approach. Choosing the correct project type, selecting the right template, and planning workflows early prevents rework. Understanding how Jira creates new projects is not only about technical setup but also about clarity in team collaboration and long-term reporting. Once you know how to create a project in Jira correctly, you will find it easier to manage backlogs, sprint planning, and cross-team progress updates.
Teams that require unified communication, document collaboration, database planning, automation, and scalability may consider exploring connected workspace platforms. Lark offers a modern experience where communication, documents, calendars, and data management stay together without moving between multiple tools. This gives balanced structure and collaboration flexibility for long-term project success.
FAQs
Can you change the project type in Jira after creating it?
Users cannot directly switch between certain project types after setup. This is why learning how to create a new project in Jira correctly matters from the beginning. If an incorrect option is selected, some users may need to recreate environments rather than modify them. Lark can help simplify planning discussions before creation.
What permissions do you need to create a project in Jira?
Users need administrator-level access or delegated creation rights from the system owner. Without correct privileges, project creation buttons stay hidden. Always verify with team administrators to avoid delays. Lark can support shared planning notes before administrator approval.
Can multiple teams collaborate inside one Jira project?
Yes, multiple teams can work inside a single environment if configured properly. View permissions, issue assignments, and workflow roles must be clearly defined. Lack of planning can lead to confusion and duplicated labels. Lark supports shared visibility areas for better structure.
What is the difference between a project key and a project name in Jira?
The project name is descriptive, while the project key generates the unique identifier for issues like DEV or MKT. Keys become permanent references and appear in all tasks and reports. Planning them early ensures long-term clarity. Lark Sheets can help track naming standards.
How do you organize existing issues when creating a new project?
Users must plan backlog grouping methods and choose either labeling, components, or custom fields. Existing tasks can be migrated using built in tools, but planning reduces cleanup issues. Using structured planning notes in Lark Docs may help before migration.
Related reading
Table of contents
Start using Lark today

Manage all your work in one place
Boost team efficiency by 10x
Save up to 70% on software costs
Table of contents
Start using Lark today
Manage all your work in one place
Boost team efficiency by 10x
Save up to 70% on software costs
Keep reading







2026 Lark Technologies Pte. Ltd.
Headquartered in Singapore with offices worldwide.






Explore: